Create Interactive Portfolio Section Using Blurb Modules in Divi
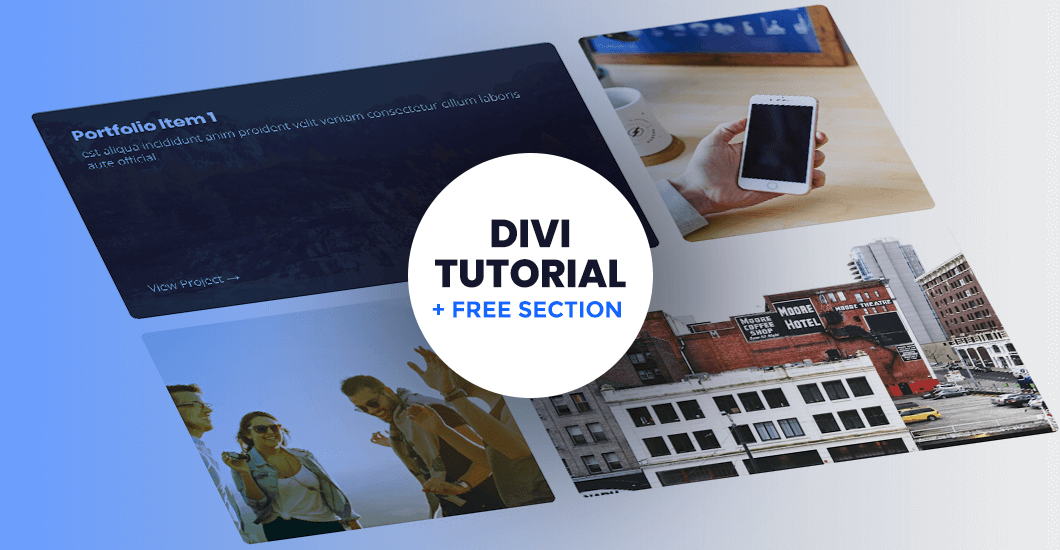

Are you looking for a way to show off your latest web design work, but are not happy with the default Divi portfolio module? Checkout this tutorial on how to create a custom portfolio section using blurb modules, and sign-up to get the layout completely FREE!
I’ve never felt satisfied with the default Divi portfolio module. As a Web Designer trying to display my work, I find it very limiting with not only the layout, but also the fact you have to link it to a portfolio item without the option of an external link.
This got me thinking of ways I could build a portfolio section using different Divi modules.
The blurb module is one of the most versatile Divi modules. The combination of an image, title, and body text can be used for so many different things. And with just a little bit of CSS magic you can turn the default blurb module into a really cool portfolio item. Here’s how…


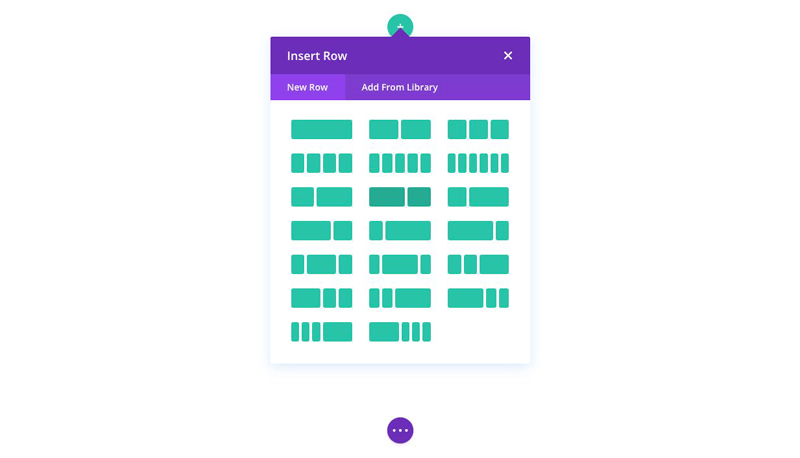
Create a section
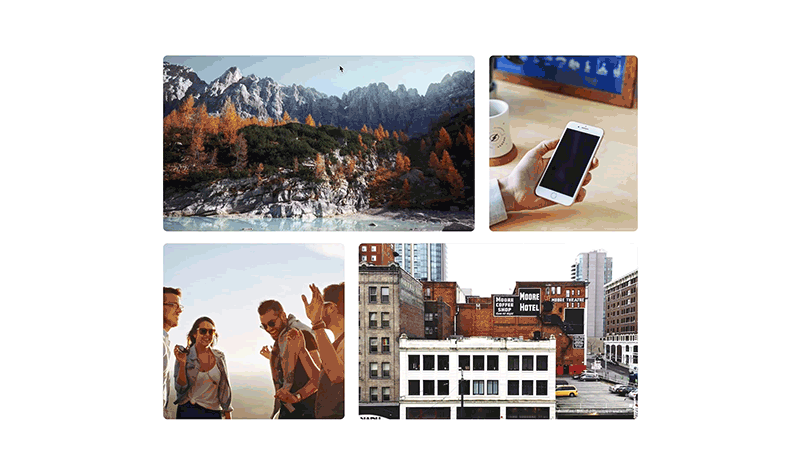
Create a new section, add a row with 2 columns. Its up to you the column widths, but for this example I used the 3/5ths and 2/5ths option.
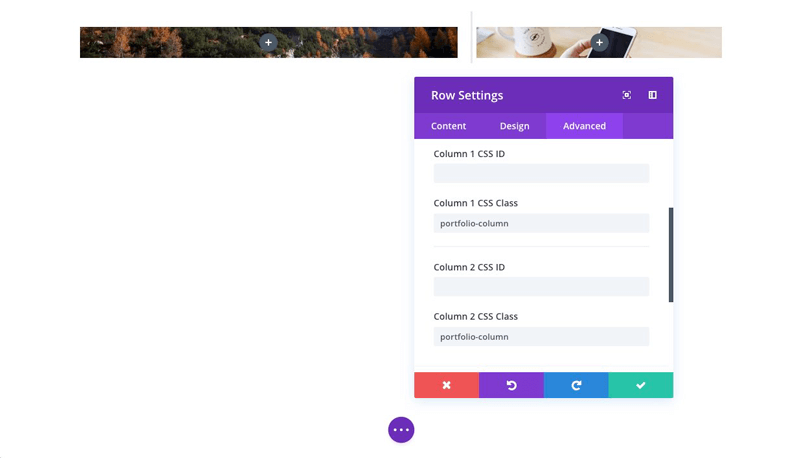
Setup your row
In the the row settings, add a background image to both columns. These images will be used as the background for each portfolio piece.
In the design tab, select “gutter-width: 2” in the sizing options.
Also in the design tab, in the spacing options, give it a bottom padding of 8px.
In the custom css tab, add “portfolio-column” to each columns custom css class box.
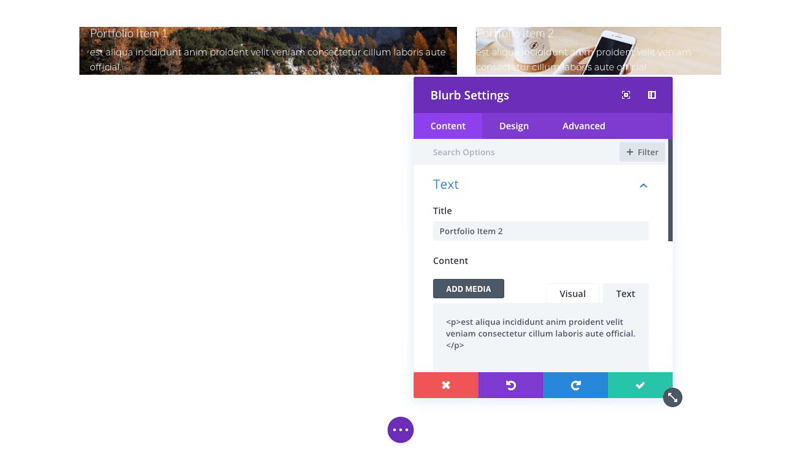
Add a blurb module
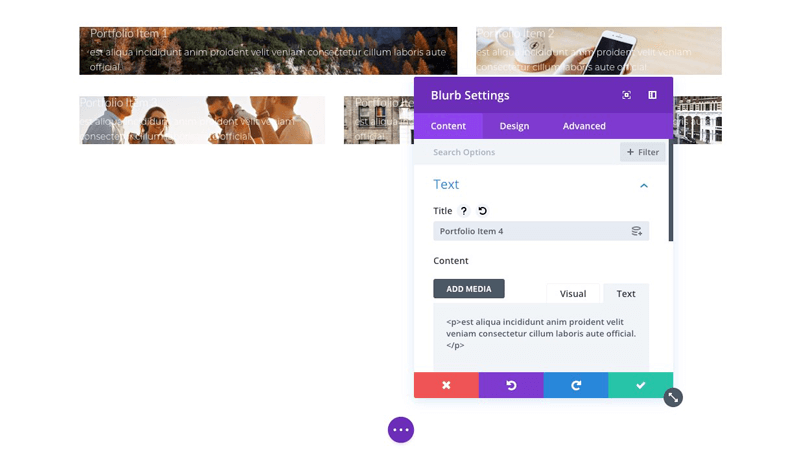
Add a blurb module to one of the columns. Give the blurb the following settings:
– Title: this will be the title of your portfolio piece
– Content: short description of the project
– In the image & icon area, remove the image
– In the background section, hover over “add background” until the mouse icon appears above, then select “hover”. Now add a semi-transparent background. For this example I’ve used: rgba(23,23,51,0.9)
– Add a module link to your project, making sure to select the “Open in new tab” option
– In the design tab, set your text to “Light”, then style to fit in with the rest of your website
– In the advanced tab, add the custom css class “portfolio-blurb”

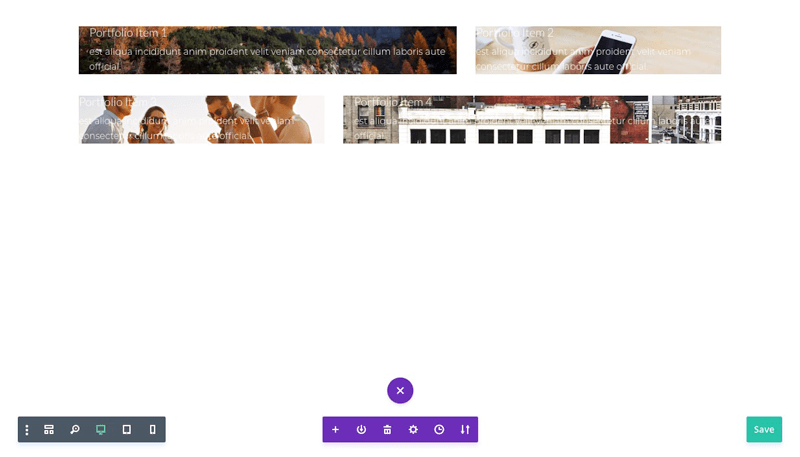
Add 2nd portfolio item
Copy and paste the blurb into the 2nd column, and update the info with your 2nd project.
Add the 2nd row
Clone your first row so you’re now displaying 4 projects. If you’re following along with the layout from this guide, I also switched the column structure to have the thinner column first.
In the row settings, update the column background images for your 3rd and 4th projects.
Update both blurb settings in the new row for your 3rd and 4th projects.
Save!
Save and publish the page.
IMPORTANT: At this stage you’ll just have a blurb with a background image, so I wouldn’t recommend doing this on a live page. Saying that, I wouldn’t recommend doing any sort of experimental updates on a live page!
If you are, then do this step after step 8.
Add custom CSS
Add the code below into your child theme style.css (or the custom css tab of your Divi Theme Options):
|
1 2 3 4 5 6 7 8 9 10 11 12 13 14 15 16 17 18 19 20 21 22 23 24 25 26 27 28 29 30 31 32 33 34 35 36 37 38 39 40 41 42 43 44 45 46 47 48 49 50 51 52 53 54 55 56 |
/*===== Portfolio Blurbs ====*/ .portfolio-blurb { min-height: 400px; padding: 40px; overflow: hidden; } .portfolio-blurb .et_pb_blurb_content { max-width: none; } .portfolio-blurb .et_pb_module_header { position: relative; top: -40px; opacity: 0; transition: all 0.4s; } .portfolio-blurb:hover .et_pb_module_header { top: 0; opacity: 1; } .portfolio-blurb .et_pb_blurb_description { position: relative; left: -40px; opacity: 0; transition: all 0.4s; } .portfolio-blurb:hover .et_pb_blurb_description { left: 0; opacity: 1; transition-delay: 0.2s; } .portfolio-blurb:after { content: 'View project →'; position: absolute; opacity: 0; bottom: 0; transition: all 0.4s; } .portfolio-blurb:hover:after { opacity: 1; bottom: 40px; transition-delay: 0.4s; } .portfolio-column { overflow: hidden; border-radius: 10px; } |
Andy Hooke
Andy is a self-taught web designer who now specialises in the Divi theme. He comes from a html & css coding background, and enjoys taking these skills to see how far he can customise Divi and create websites which don’t look like your standard Divi websites.
Use coupon code SLIDER15 at checkout!


Very good useful post. Thanks.
You welcome Jitendra 🙂 I hope it will be useful!
Looking crisp, thanks for sharing!
Thank you so very much Andy for sharing precious information with us. It really helps.
Thats great! I was just looking for this features since weeks!
What if I would like to have more than 2 columns? What should I change in the CSS code, a part addin the class for third coloumn too?
Hi Gianni,
It’s no problem. Just select the number of columns you want and make sure to add custom CSS class to each column (see step 2).
This looks great, any suggestions for getting a similar result with a Filterable Portfolio?
Very Nice tutorial Andy, defiantly will be using this one. Is there any chance you could do some unique footer layouts?
Thanks Shane -that’s a great idea!
Very cool… I’ve enjoyed your last few posts very much, thanks!
Thanks for the tutorial. Just a few question, maybe I miss something:
1. How do you round the corner pictures (I have all squared)?
2. I don´t understand in step 3 what you refer to “hover” under “add background” I do not have that option. I do not see the transition to blue you have in your demo
3. It doesn´t open other page when I click “View Project”. I need it open other page with more pictures. How must it be configuered? Why do you mentione in step 3 add a module link … “open in a new tab”.
Hey Claudio! In response to your first question, in Step 2 you add the class “portfolio-column” to each of the columns, and this has styling attached which rounds the corners.
For question 2: if you hover over the background color option icons will appear above. Click the one which looks like a mouse and you’ll see the “hover” toggle to set the hover background setting.
(You need to be on the latest version of Divi and using the front-end builder for this option).
For question 3: This is a setting in the blurb module in the “content” tab. If you don’t see this option it means you’re on an older version of Divi and need to update.
Hope that all helps!
Thanks for the great tutorial. I do have one question. I would like to display the project category in place of the “View Project” text. Is there a way to insert a call for the project category via CSS? I’ve spent several hours and have turned up no help at all. Thanks!
Hey Chuck – glad you like the tutorial! To change the “View project” text, you need to find this part of the CSS:
.portfolio-blurb:after {
content: ‘View project →’;
position: absolute;
opacity: 0;
bottom: 0;
transition: all 0.4s;
}
And update the content part inside the ‘ ‘. Hope that helps!
Nice presentation. Thanks for the guide.
Brilliant ‘Tutorial’ – I will definitely be using this…