Custom Divi Blurbs – Part 4
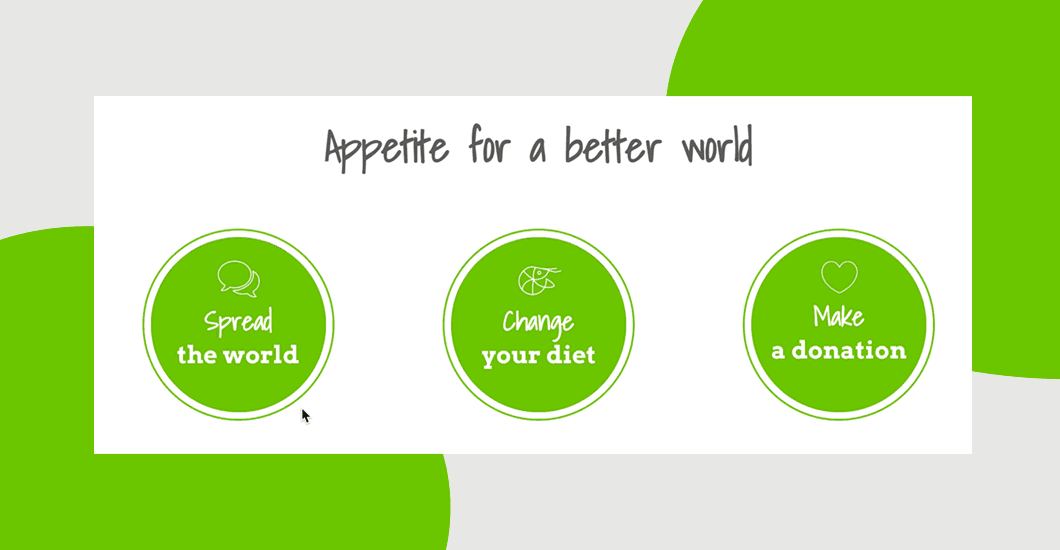

Divi Blurb module gives a huge possibilities, and with a bit of customization and custom code we can achieve a really nice and interactive effects, that will look amazing on our websites. In this tutorial I will show you how to customize the Blurb Module, add a nice hover effect that will open our blurb with mouse direction and show image. We will tweak the Blurb settings, add some HTML to the Blurb content field, and, finally, add custom CSS and JS that will do the best part of the magic.
Let’s get back to our custom Divi blurbs, because we have prepared a nice easy shortcut for you! This tutorial will guide you step by step through the process. But if tutorials are not your thing, and you’d like to achieve this effect right away, no sweat, then use our layout! We have prepared 3 different hover effects and you can download the layout with all of them and import it to your Divi Library. So simple!
If you haven’t seen our previous tutorials on blurbs, take a look:
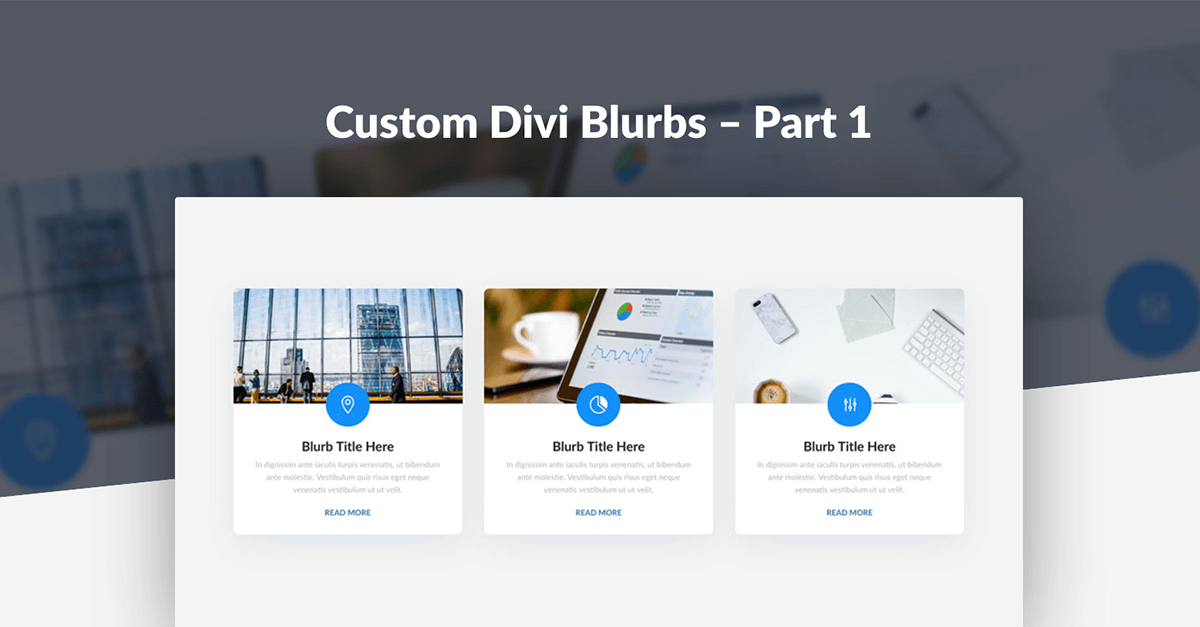
Custom Blurbs – Part 1
Custom Blurbs – Part 2
Custom Blurbs – Part 3
And now, let’s get to work.
- You will need to have the Divi Theme by Elegant Themes installed.
- You can follow this tutorial or download our Ready-To-Use Divi Layout with all code embedded.


Add section and columns
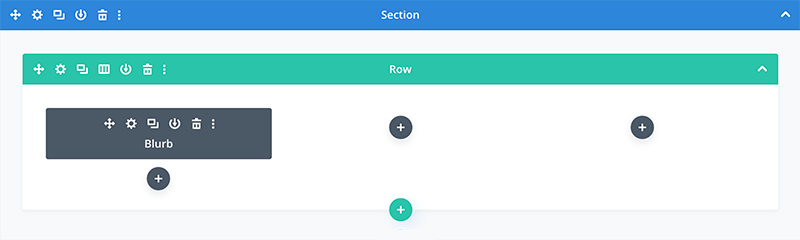
2. Add the Blurb module to one column (we will be editing settings, and to save us some work, after finishing the module in the first column, we will copy it to the second and third column so the same options will apply).
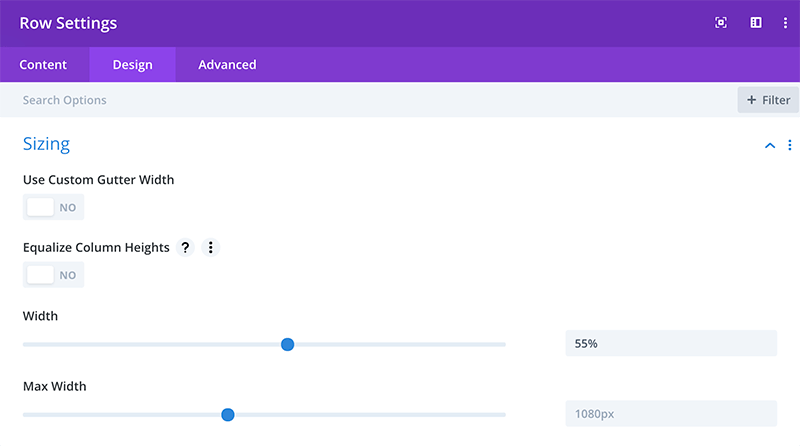
Change Row Width
To make this layout more responsive I changed Row width to 55%.
To do that open Row Settings, go to Design→Sizing and set Width slider at 55%.
Add Blurb Text and Image/Icon
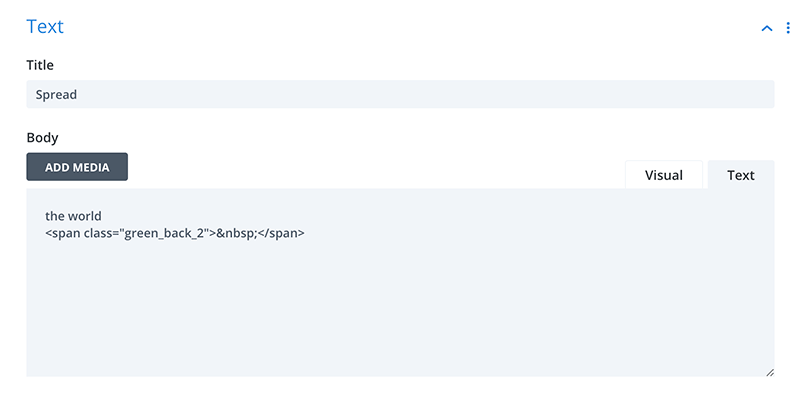
In this step we will add texts and icon to our Blurb. Go to Content → Text tab and add Title and Body text.
In Body text we will use span class green_back_2
Now let’s add Image/Icon to our Blurb. For this tutorial we have used white, transparent icon image (.png format). Go to Content → Image & Icon tab and upload your desired image.
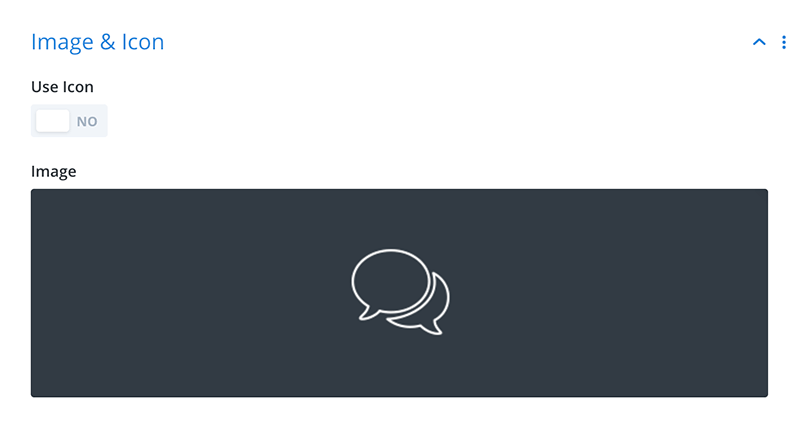
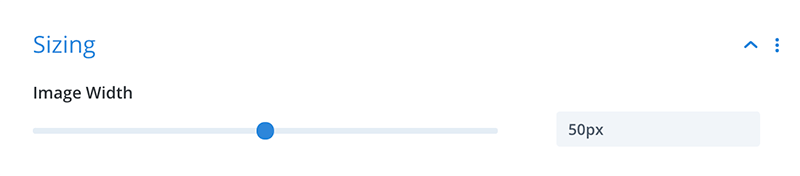
We also need to make sure that our image isn’t too big or too small. To control image size go to Design → Sizing tab and set Image Width to 50px.
Edit Blurb Module Background
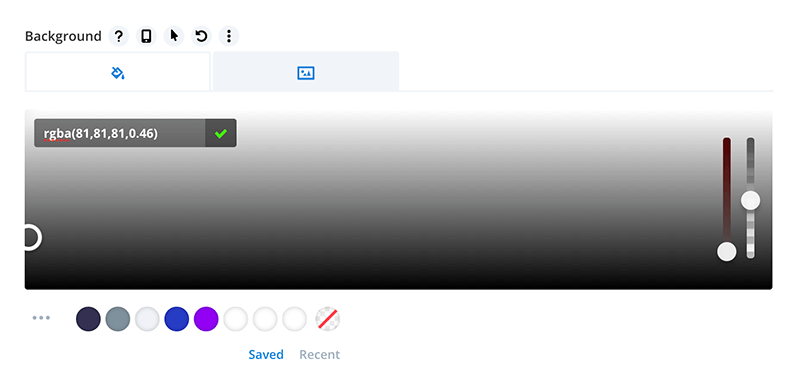
In this step, we will be editing Blurb Background. To do that we need to open Blurb module settings and in Content→ Background tab set our color. In Color field we have used dark overlay color rgba(81,81,81,0.46).
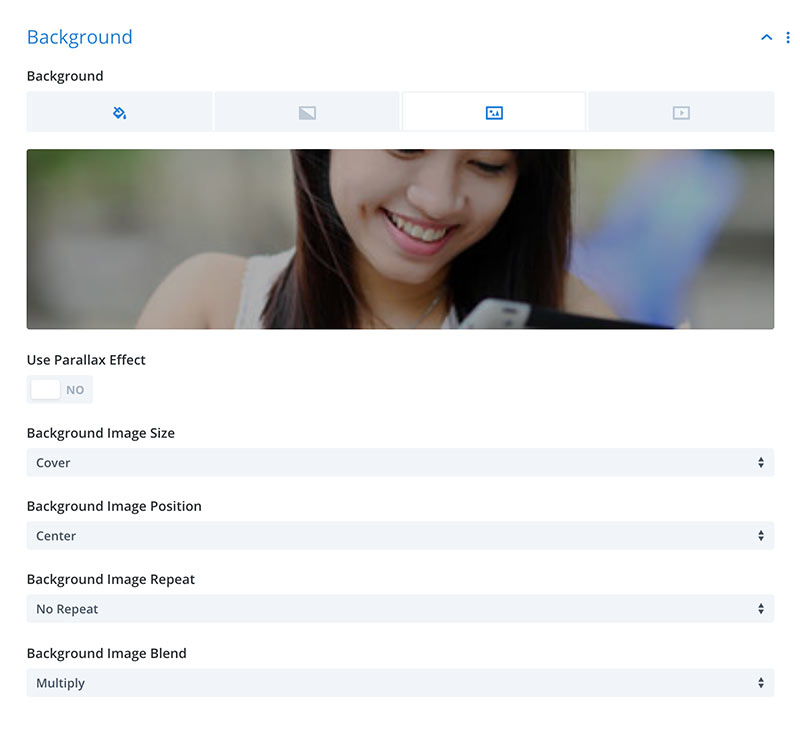
Now in Content→ Background select Image tab, upload your image and set Background Image Blend to Multiply.
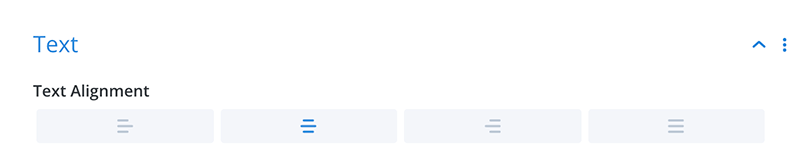
Set Blurb Text Alignment
We want our Blurb content to be centered. We can easily center Title and Description text in Design → Text tab.
Customize Typography
To make our Blurb texts just like on the demo page, we need to tweak Title & Description text.
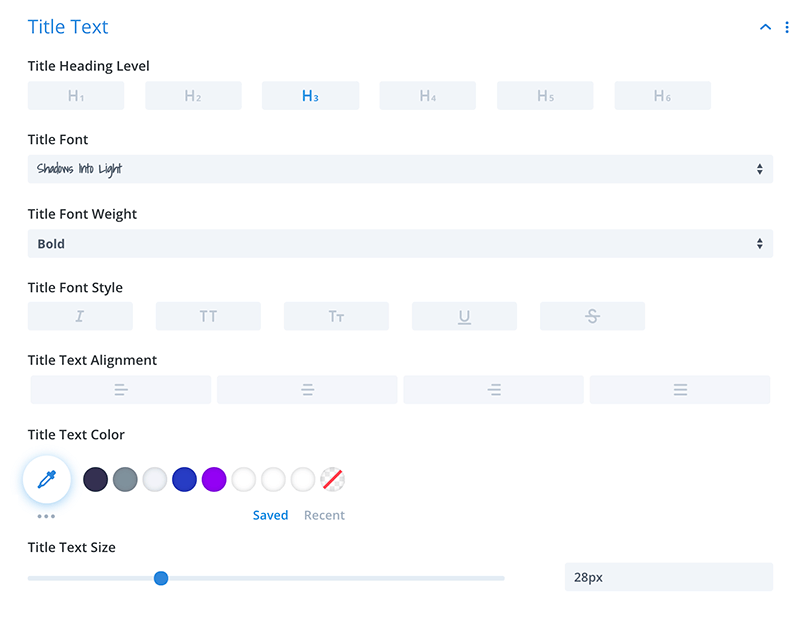
To to that go to Design → Title tab and add the following values:
– Title Heading Level: H3
– Title Font: Shadows Into Light
– Title Font Weight: Bold
– Title Text Size: 28px
– Title Text Color: #ffffff
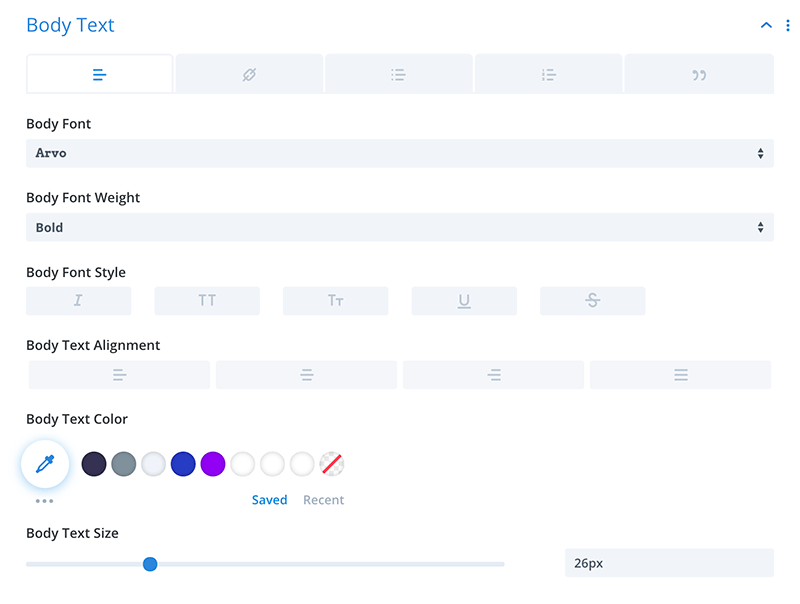
Now let’s edit Description Text. Go to Design → Body Text tab and add the following values:
– Body Font: Arvo
– Body Font Weight: Bold
– Body Text Color: #ffffff
– Body Text Size: 26px
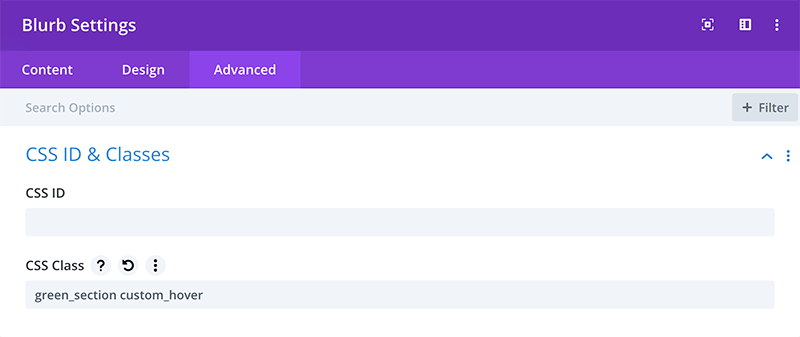
Add custom CSS class to Blurb module
In this step, we will add custom CSS class to our Blurb. Open Blurb module settings and go to Advanced CSS ID & Classes and add the following 2 classes: green_section and custom_hover
Add custom CSS
Now we will add some CSS to the Divi/Theme Options/Custom CSS section, or copy and paste it into your style.css file located in your child theme if you have one (recommended).
|
1 2 3 4 5 6 7 8 9 10 11 12 13 14 15 16 17 18 19 20 21 22 23 24 25 26 27 28 29 30 31 32 33 34 35 36 37 |
/* Blurb Style 2 */ .custom_hover{margin: 0 auto !important;} .custom_hover:hover span.green_back{ top: 0; left: 0; width: 100% !important; height: 100% !important; } .custom_hover:focus, .custom_hover:hover { text-shadow: 0 3px 20px rgba(0,0,0, .5); box-shadow: 0 0 0 2px #73c800, 0px 14px 25px -2px rgba(0, 0, 0, 0.2) !important; } .green_back_2{ display: block; position: absolute; z-index: -1; top: 50%; left: 50%; width: 0; height:0; opacity: 1; border-radius: 50%; border: 200px solid #73c800; background-color: transparent; -webkit-transform: translate3d(-50%, -50%, 0); transform: translate3d(-50%, -50%, 0); -webkit-transition: width .2s ease-in-out,height .2s ease-in-out, opacity .3s ease-in-out, border .5s ease-in-out; transition: width .2s ease-in-out,height .2s ease-in-out, opacity .3s ease-in-out, border .5s ease-in-out; -webkit-box-sizing: content-box; box-sizing: content-box; } .green_section.hover .green_back_2 { width:250%; height:250%; opacity: 0; } |
Add custom JavaScript
In this step, we will add JS code that will add separate classes to the default and mouseover element. Copy the code below, then go to Divi → Theme Options and select the Integration tab. Paste your JS code to Add code to the < body > (good for tracking codes such as google analytics) field and click Save.

|
1 2 3 4 5 6 7 8 9 10 11 12 13 14 15 16 17 18 19 20 21 22 23 24 25 26 |
<script type='text/javascript'> jQuery('.green_section').each(function(){ var btn = jQuery(this), tick = btn.find('.green_back_2'); btn.hover(function(event) { if (jQuery(window).width() >= 980) { var offset = btn.offset(), x = event.pageX - offset.left, y = event.pageY - offset.top; tick.css({ 'left' : x + 'px', 'top' : y + 'px' }); } btn.addClass('hover'); }, function() { btn.removeClass('hover'); tick.css({ 'left' : "", 'top' : "" }); }); }); </script> |
That’s it! Thank you for your attention! This was the fourth part of the series where I’m showing you how to creatively customize the Divi Blurb module. If you enjoyed this tutorial, please let me know in the comments below. And don’t forget to share the effects of your work!
Maciej Ekstedt
Maciej is the founder and CEO of B3 Multimedia Solutions. He is a self-made web designer and marketing expert, and he loves his job so much that he barely leaves the office. He transforms creative ideas into effective strategies for his company and for his clients. Maciej is fascinated by the phenomenon of megalopolis. He notices patterns and details which make up the whole thing, and he uses these skills in his work.
Get Divi Icons PRO today!
We have a sweet deal for you! You can get the best icon plugin for Divi with a 10% discount! Use the coupon code DIVIICONS10 at checkout!

Hi Maciej! Always a pleasure to hear and see from you. GREAT JOB! As a beginner it’s very interesting to see the step. Looking forward to seeing more nice examples. Greetings from sunny Germany, DIRK
Thank you Dirk! Really appreciate and glad to hear that you like it! Greetings from… picturesque Ireland